
'Brian' The 25 - Repairs & Update
-
ROVER Cabby
- Forum User
- Posts: 1765
- Joined: Wed Feb 17, 2016 1:17 pm
- Location: UK
Re: The Mrs' Car, 'Brian' - Repairs & Update
My 25X may become a track tart.
-
ROVER Cabby
- Forum User
- Posts: 1765
- Joined: Wed Feb 17, 2016 1:17 pm
- Location: UK
Re: 'Brian' The 25 - Repairs & Update
PHASE 2 BEGINS.................
Now that Brian is SORN and due to the fact that my Dad's 25 is slowly dying from ROVERitis myself
and 'The Steve' are going to concentrate our efforts getting Brian ship shape for my Dad to use as
it has less issues.


My Dad's 25 will become a parts resource, a £250 gift that will keep giving, he has had it over 3 years
now and it has served him very well, but it has multiple issues that are hard to fix on the cheap, it
has a big phantom coolant leak and because my Dad is 137 years old and doesn't listen he hasn't topped
up the bottle with coolant when it gets low so he is now probably rocking 90% neat water in the cooling
system, with the winter we have had it could now have possible cracked block issues.
It is also taking on water though the sunroof and through a gap somewhere on the tailgate, car stinks
of bad damp and has mould in the boot, the gearbox is a total pain as it won't go into 1st gear without
crunching so you have to go from 2nd to 1st so it isn't worth saving, as I said we can use it for parts so
will still be a great £250 investment and i'll be using its MEMS3 wiring system and the A/C components
on my R8 Cabby.
WINNING !
Anyway, back to Brian.
The cam carrier oil leak has gotten much much worse and it is also leaking coolant out the back of the
block, it has also developed a hesitation on start up, we suspected HGF even though we have no mayo
but at least one piston pot is getting coolant inside it, my Cabby didn't have mayo but after the Water
pump failed we checked the original gasket and it was just as well as it was a total failure waiting to
happen.
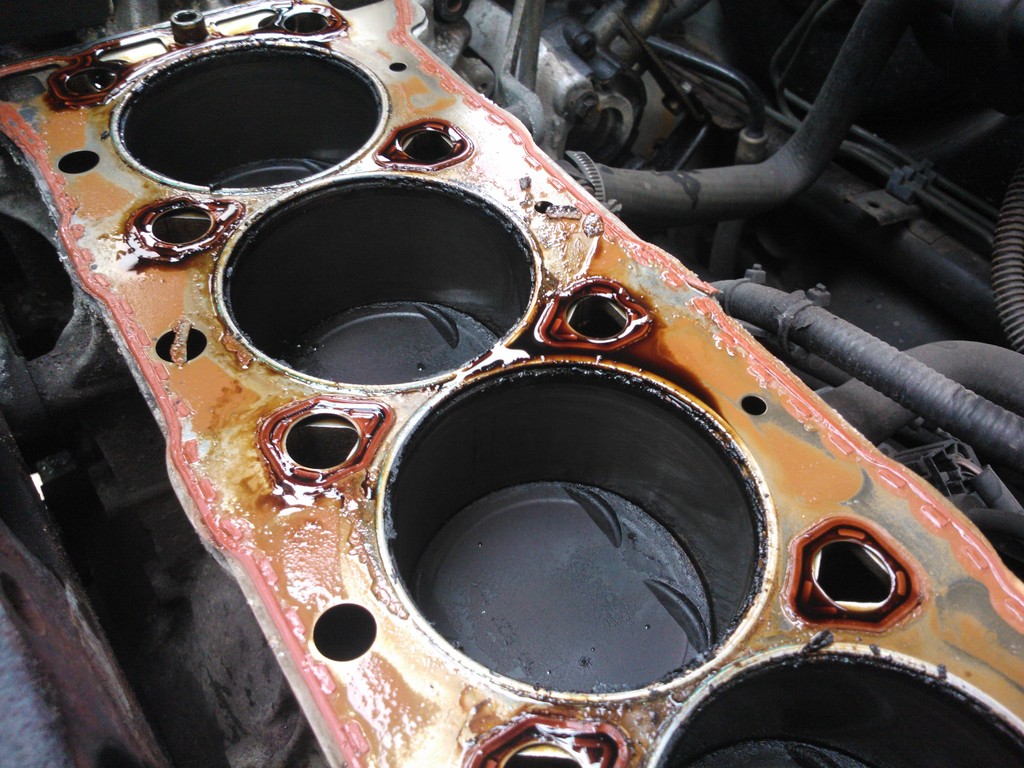
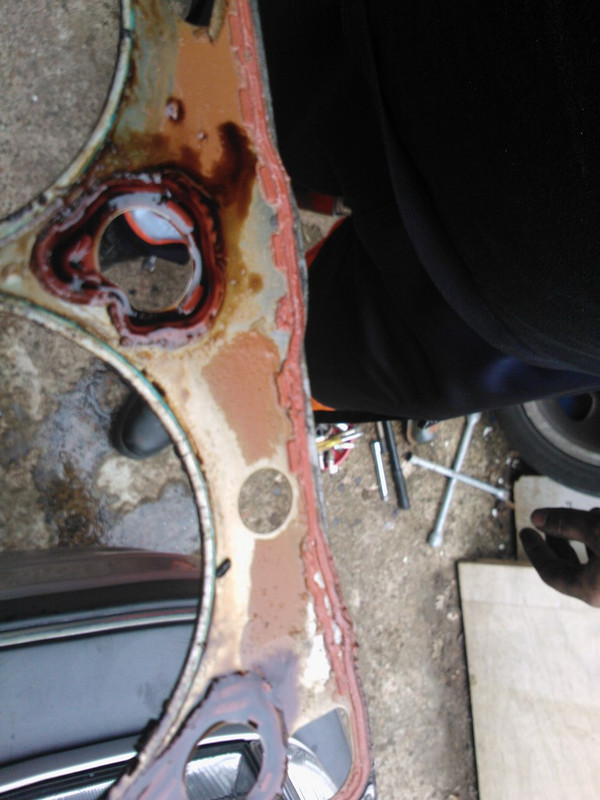
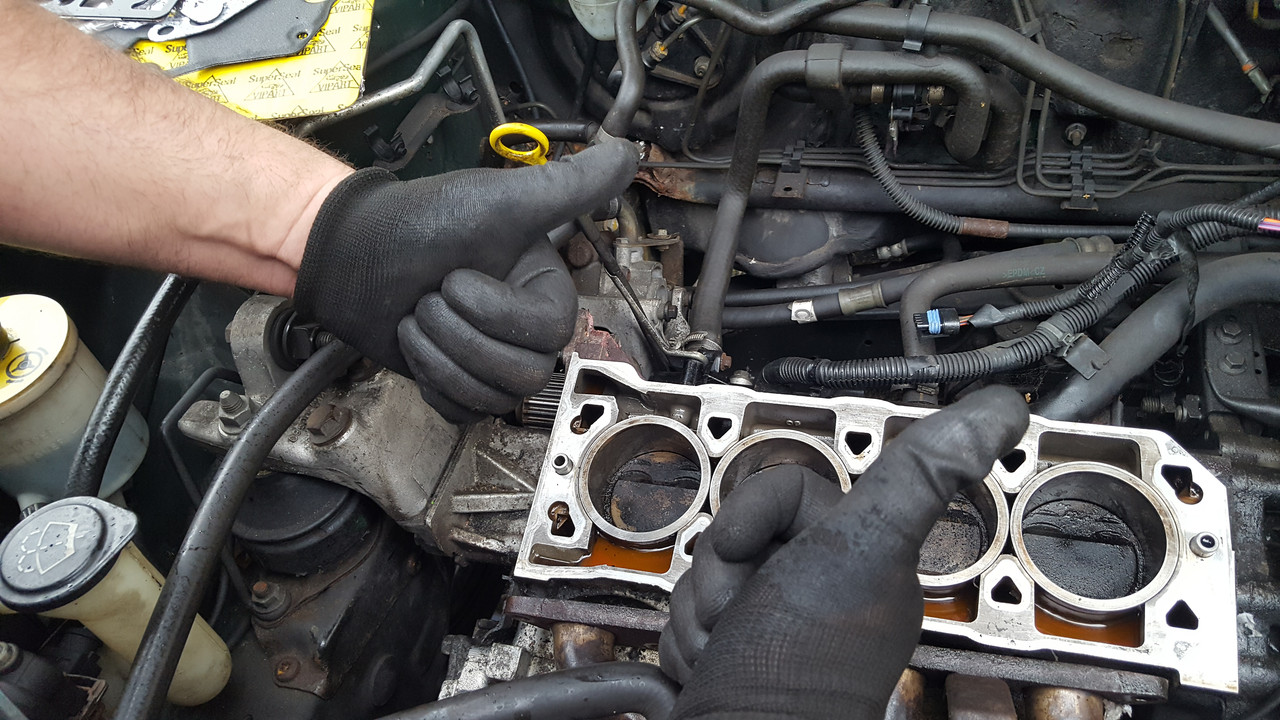
We took off the head on Brian and found it had an MLS gasket fitted but it looked like it was stuck down
with some black gunk or silicone which could account for it not sealing properly, it is also a high possibility
that the head has been off before and this MLS was reused, these things come to test us, but above
all, it is a............

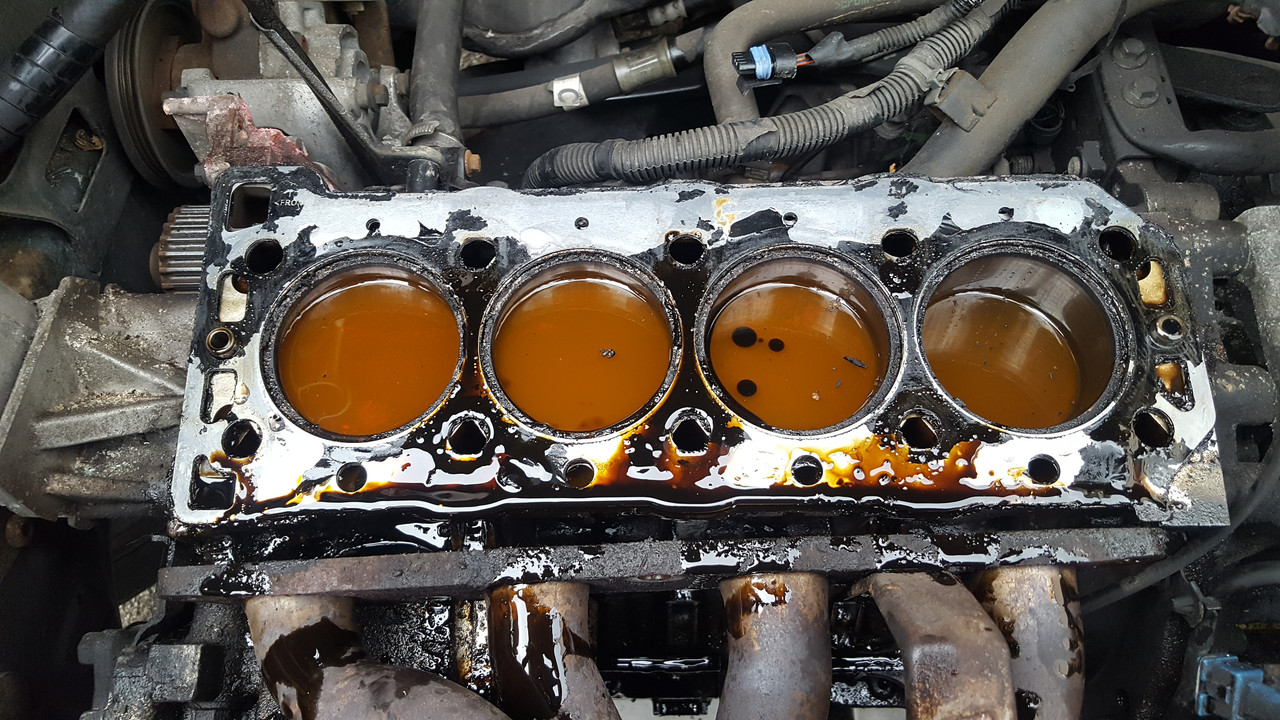
As you can see we had no mayo but pot 1 was filled with coolant before the head came off as we left
it overnight, took the plugs out the next day and cranked it and were greeted to a jet of coolant out
of plug hole 1.
So it was off to EuroCarParts to make the most of the Valentines Day 50% off deal on the Click and Collect
to get a few bits on bobs like degreaser, belts and coolant, they must have seen me coming, was like
being served by Josh Fiddler, "Do you need aux belts ?"

ebay as usual provided a few other odds and ends too but we called it a day and 'The Steve' decided to be
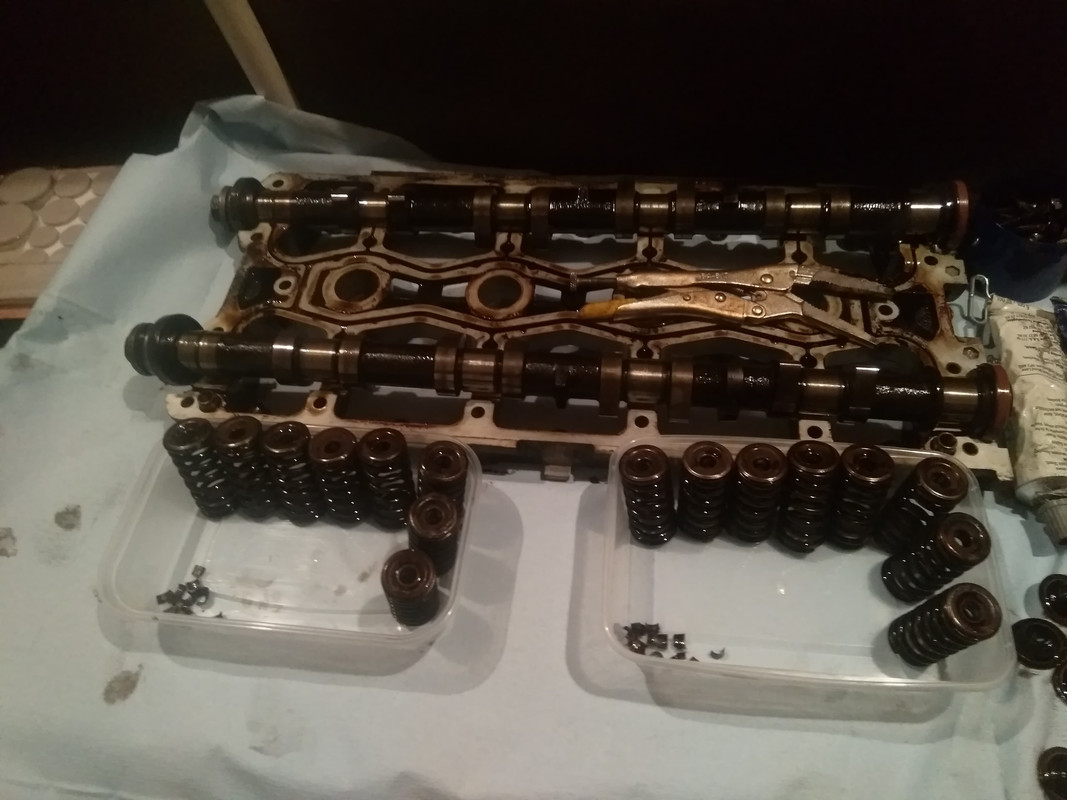
really fastidious and fully strip the head to clean it up and do the valve stem oil seals at home and re-lap
all the valves, I told him not to bother but its like talking to a 6"3' bald Welsh brick wall.

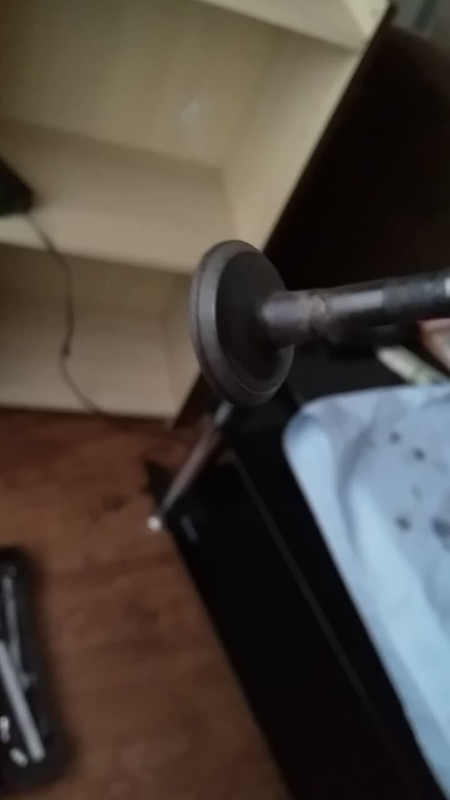
Here is his progress so far.
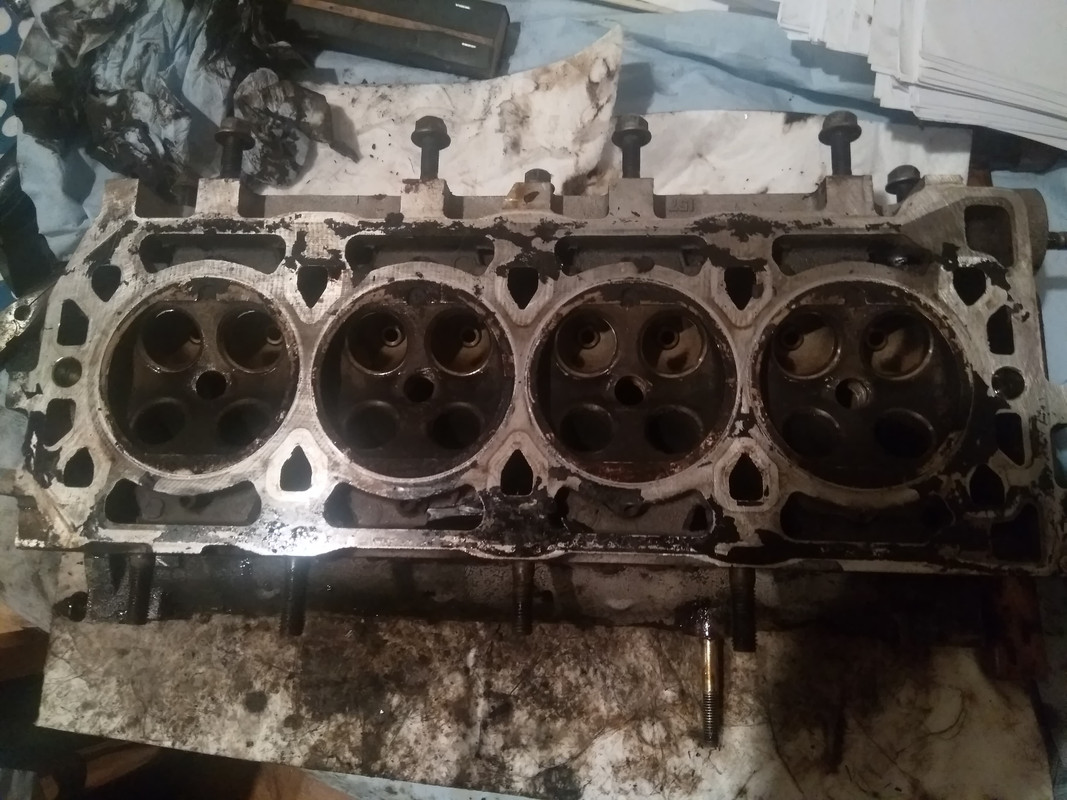

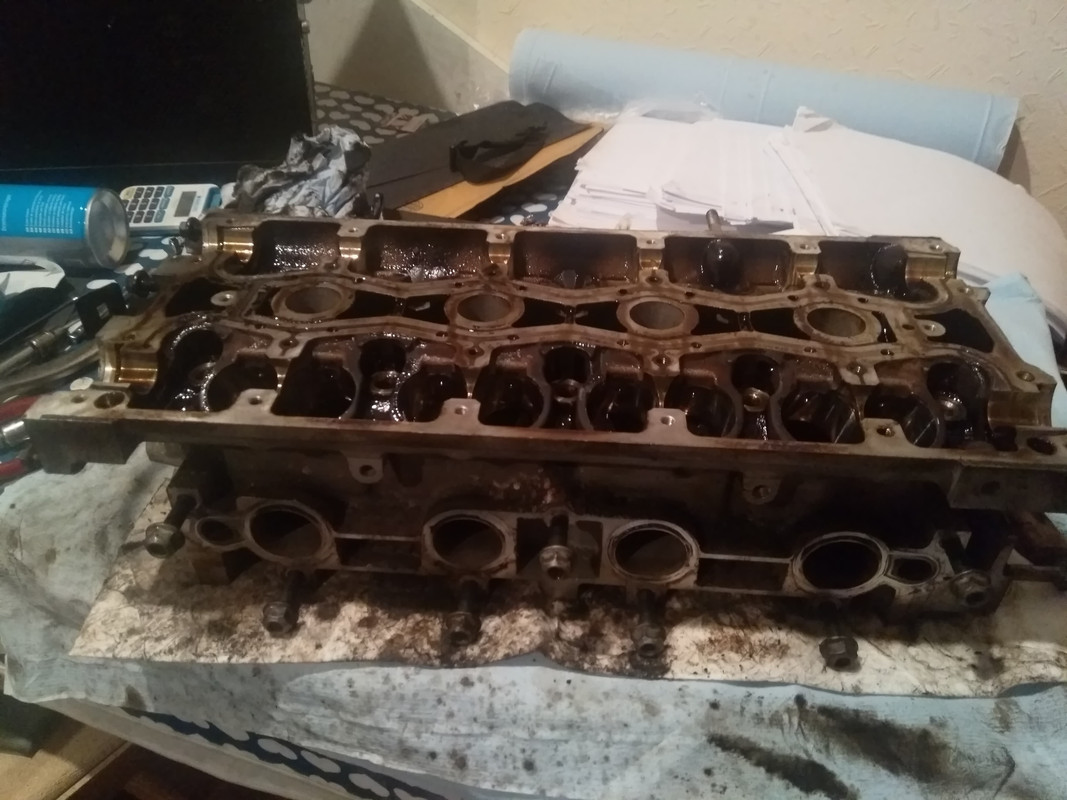
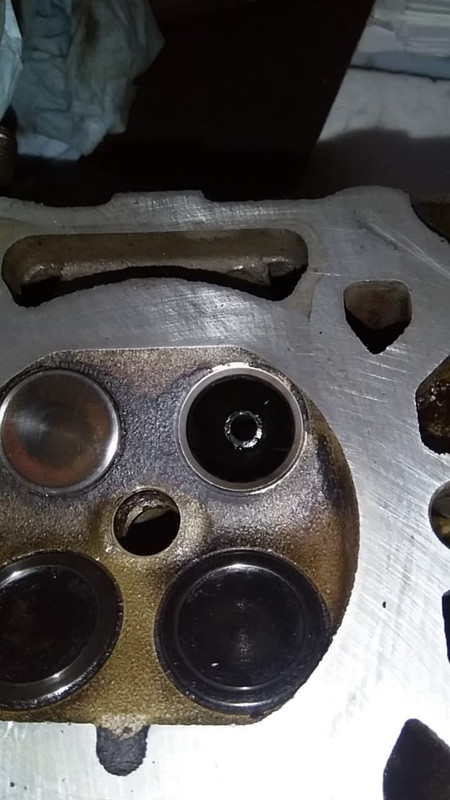
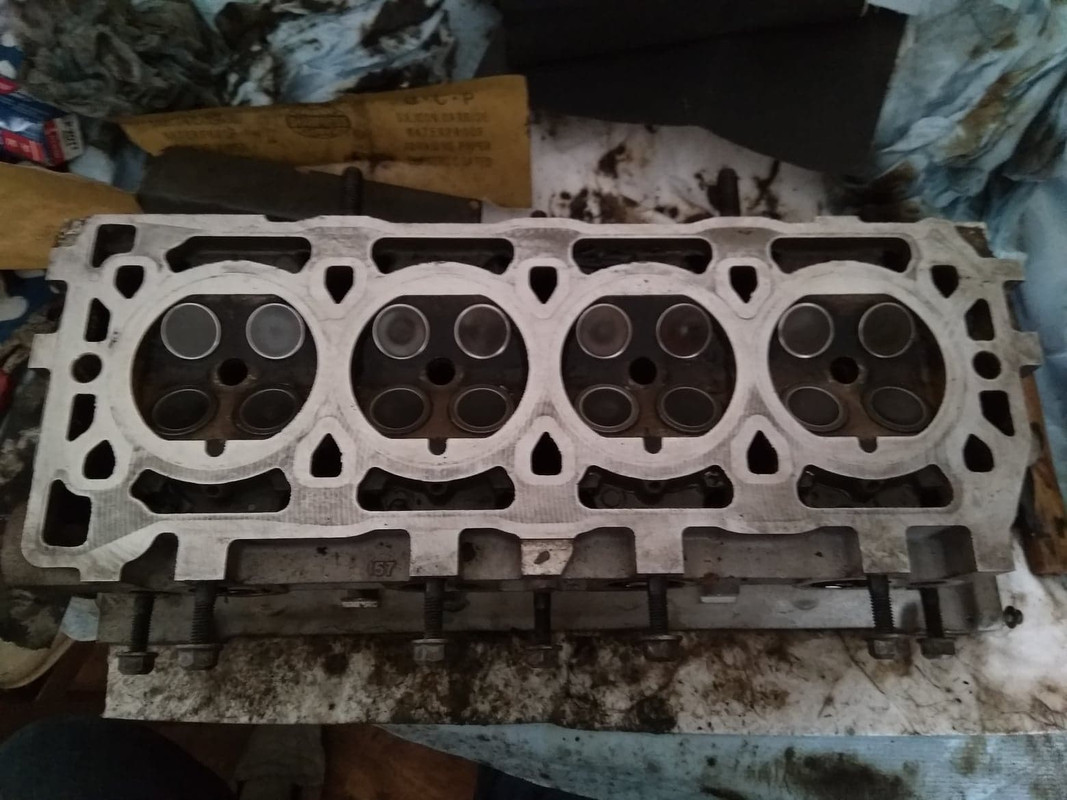
The head was checked for cracks but it has none that 'The Steve' could see, the valve seats are ok but the
exhaust valve seats have a fair bit of putting but it was coming out ok, just taking a little longer than usual.
The face of the head is perfect and it was straight edged and it's flat as Holland.
The head is now ready to go back on the car and we are going to finish all this off on Thursday along with lots
of cups of tea, bacon and egg plus possibly a vat of Curry too, stay tuned next weekend for a follow up and
final progress report, if we get a chance then we will attempt to sort out the faulty radio wiring so at least my
old man can crank up the bass and listen to some sic banging tunes on Radio 4.


Now that Brian is SORN and due to the fact that my Dad's 25 is slowly dying from ROVERitis myself
and 'The Steve' are going to concentrate our efforts getting Brian ship shape for my Dad to use as
it has less issues.
My Dad's 25 will become a parts resource, a £250 gift that will keep giving, he has had it over 3 years
now and it has served him very well, but it has multiple issues that are hard to fix on the cheap, it
has a big phantom coolant leak and because my Dad is 137 years old and doesn't listen he hasn't topped
up the bottle with coolant when it gets low so he is now probably rocking 90% neat water in the cooling
system, with the winter we have had it could now have possible cracked block issues.
It is also taking on water though the sunroof and through a gap somewhere on the tailgate, car stinks
of bad damp and has mould in the boot, the gearbox is a total pain as it won't go into 1st gear without
crunching so you have to go from 2nd to 1st so it isn't worth saving, as I said we can use it for parts so
will still be a great £250 investment and i'll be using its MEMS3 wiring system and the A/C components
on my R8 Cabby.
WINNING !
Anyway, back to Brian.
The cam carrier oil leak has gotten much much worse and it is also leaking coolant out the back of the
block, it has also developed a hesitation on start up, we suspected HGF even though we have no mayo
but at least one piston pot is getting coolant inside it, my Cabby didn't have mayo but after the Water
pump failed we checked the original gasket and it was just as well as it was a total failure waiting to
happen.
We took off the head on Brian and found it had an MLS gasket fitted but it looked like it was stuck down
with some black gunk or silicone which could account for it not sealing properly, it is also a high possibility
that the head has been off before and this MLS was reused, these things come to test us, but above
all, it is a............
As you can see we had no mayo but pot 1 was filled with coolant before the head came off as we left
it overnight, took the plugs out the next day and cranked it and were greeted to a jet of coolant out
of plug hole 1.
So it was off to EuroCarParts to make the most of the Valentines Day 50% off deal on the Click and Collect
to get a few bits on bobs like degreaser, belts and coolant, they must have seen me coming, was like
being served by Josh Fiddler, "Do you need aux belts ?"
ebay as usual provided a few other odds and ends too but we called it a day and 'The Steve' decided to be
really fastidious and fully strip the head to clean it up and do the valve stem oil seals at home and re-lap
all the valves, I told him not to bother but its like talking to a 6"3' bald Welsh brick wall.
Here is his progress so far.
The head was checked for cracks but it has none that 'The Steve' could see, the valve seats are ok but the
exhaust valve seats have a fair bit of putting but it was coming out ok, just taking a little longer than usual.
The face of the head is perfect and it was straight edged and it's flat as Holland.
The head is now ready to go back on the car and we are going to finish all this off on Thursday along with lots
of cups of tea, bacon and egg plus possibly a vat of Curry too, stay tuned next weekend for a follow up and
final progress report, if we get a chance then we will attempt to sort out the faulty radio wiring so at least my
old man can crank up the bass and listen to some sic banging tunes on Radio 4.
-
ROVER Cabby
- Forum User
- Posts: 1765
- Joined: Wed Feb 17, 2016 1:17 pm
- Location: UK
Re: 'Brian' The 25 - Repairs & Update
The fun doesn't stop there, we still need to take the car to a guy who is going to crack off a broken
locking wheel nut, I wouldn't mind but if it was an OEM locker I can get it off myself but it has these
stupid aftermarket ones that disintegrated.
Once that is off its getting two new front tyres and a fresh MOT, i'll get it into my Dads name and he
can enjoy some non-damp full leather Rover cushtyness, the only downgrade is that it is a 1.4 and his
current 25 is a 1.6 but he will just have to lump it.
-
RoverRevival

- Forum User
- Posts: 7558
- Joined: Fri Aug 26, 2011 8:08 pm
- Location: Manchester
Re: 'Brian' The 25 - Repairs & Update
OMG it actually looks like "The Steve" actually did a good job there.
Watch that, he'll lull you into a false sense of security.
-
ROVER Cabby
- Forum User
- Posts: 1765
- Joined: Wed Feb 17, 2016 1:17 pm
- Location: UK
Re: 'Brian' The 25 - Repairs & Update
Tell me about it, he said we can reconnect the cut cambelt so long as we use copper staples.
-
RoverRevival
- Forum User
- Posts: 7558
- Joined: Fri Aug 26, 2011 8:08 pm
- Location: Manchester
Re: 'Brian' The 25 - Repairs & Update
That sounds more like Steve 
-
ROVER Cabby
- Forum User
- Posts: 1765
- Joined: Wed Feb 17, 2016 1:17 pm
- Location: UK
Re: 'Brian' The 25 - Repairs & Update
Thanks to GTI John for moving this to the Project Cars section as I have redirected its focus from a problem
solving topic to a minor project.
solving topic to a minor project.
-
ROVER Cabby
- Forum User
- Posts: 1765
- Joined: Wed Feb 17, 2016 1:17 pm
- Location: UK
Re: 'Brian' The 25 - Repairs & Update
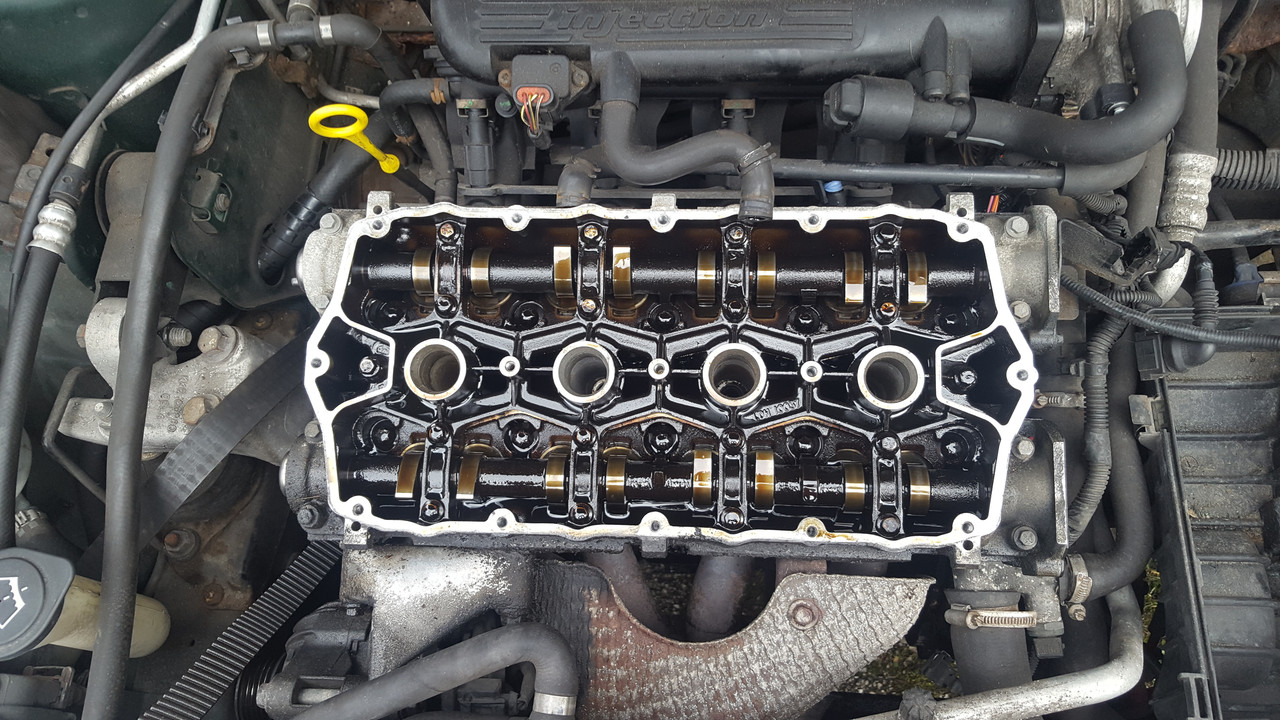
Small update, we cracked on last Thursday but the weather was not good, rain did slow us up and ended up
stopping us, only a few photos as we were covered in oil and obviously with the rain getting heavy.
Finished cleaning up the block, the surface was lightly sanded and wiped over with brake cleaner, I also got
any oil contamination out the waterways with a syringe, before we finished last week we sprayed and wiped
WD40 in the bores to prevent rust, it had a bonus effect, it lifted up the heavy carbon deposits off the top of
the pistons, quite happy with how it turned out.
Needless to say it got the obligatory thumbs up seal of approval from 'The Steve'.
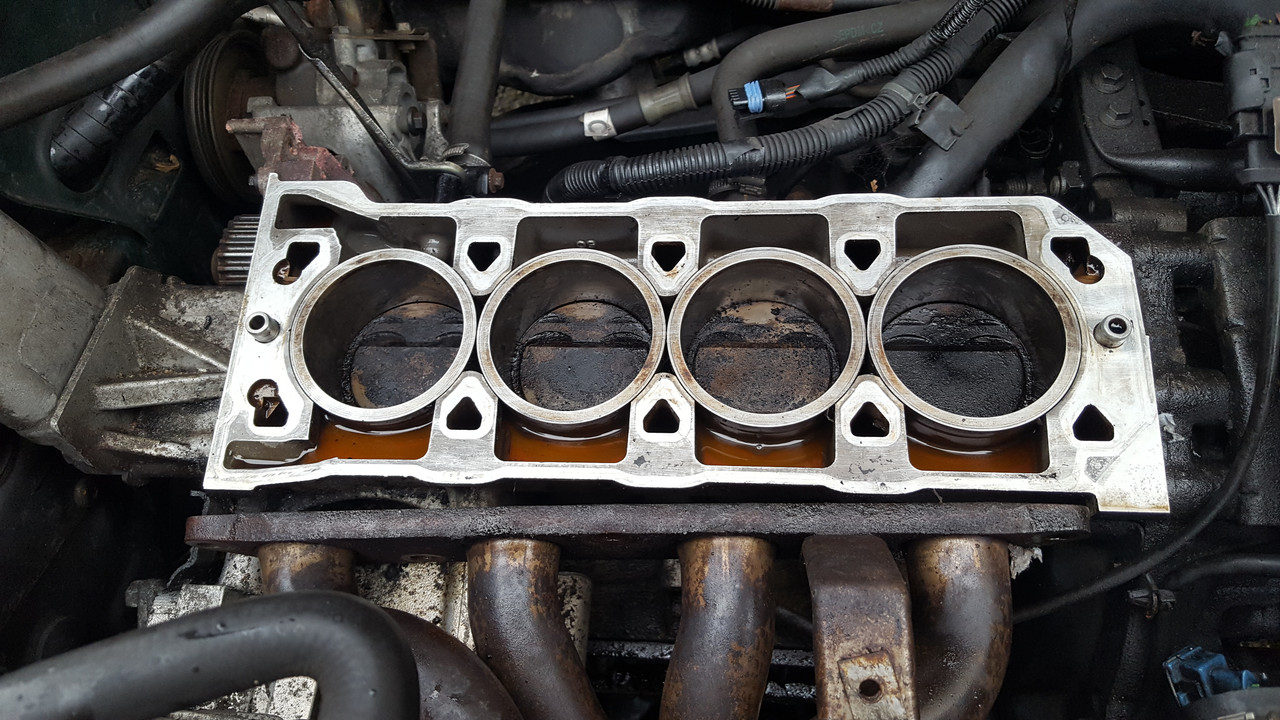
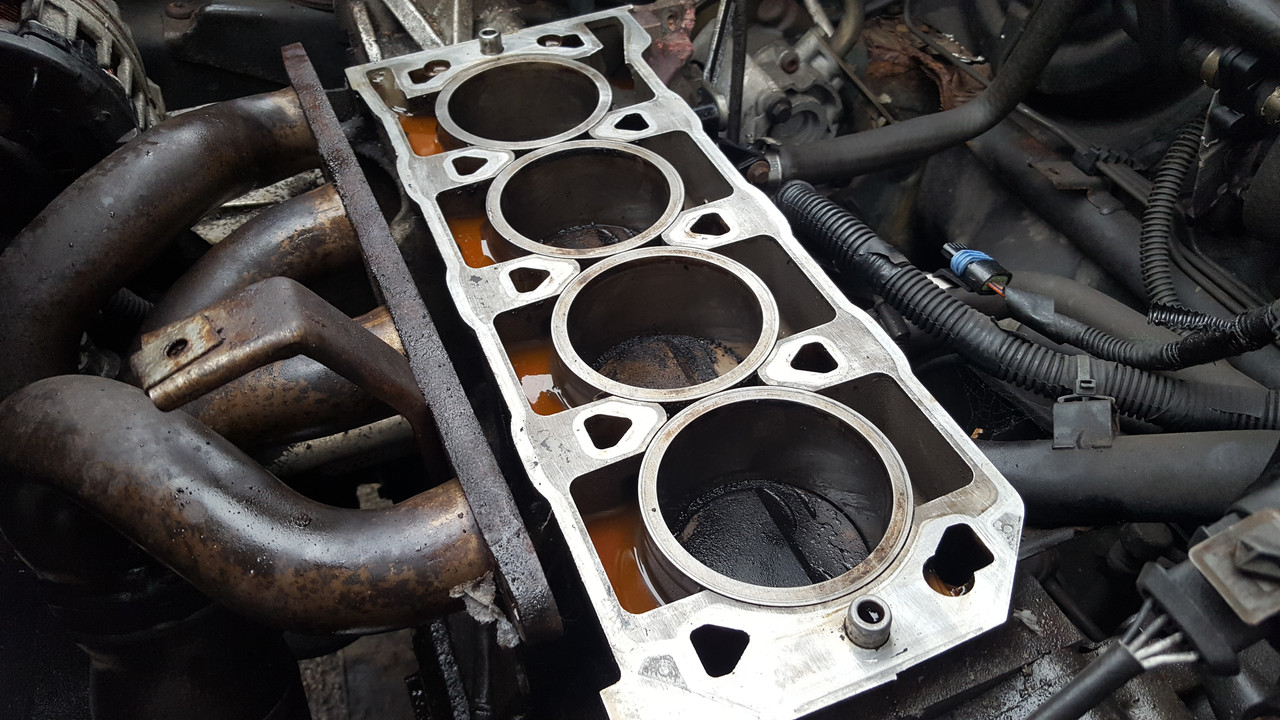
New MLS put in place.
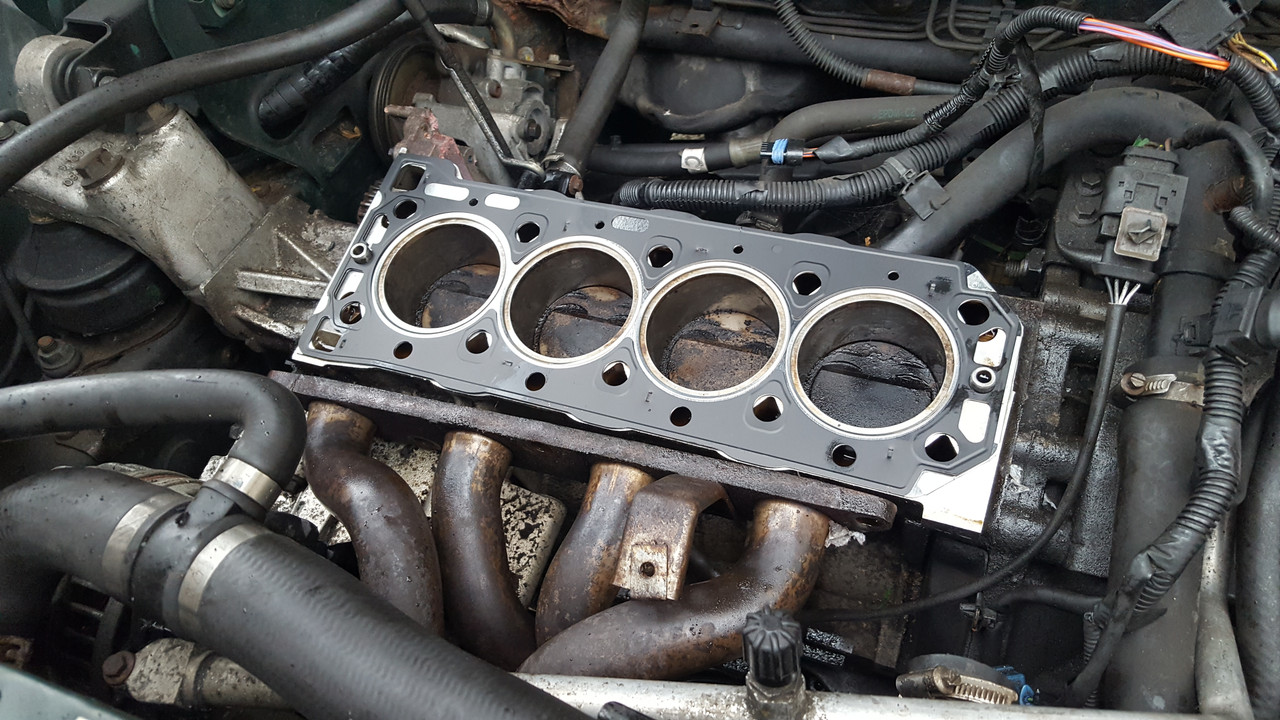
We got the head in place and threw in the new head bolts and out came 'The Steve's'
worst fear, 'The Haynes book of Lies' for the torque settings.
......and that is that really, rain stopped play so when we get stuck in again we will
get more photos and update you all.
stopping us, only a few photos as we were covered in oil and obviously with the rain getting heavy.
Finished cleaning up the block, the surface was lightly sanded and wiped over with brake cleaner, I also got
any oil contamination out the waterways with a syringe, before we finished last week we sprayed and wiped
WD40 in the bores to prevent rust, it had a bonus effect, it lifted up the heavy carbon deposits off the top of
the pistons, quite happy with how it turned out.
Needless to say it got the obligatory thumbs up seal of approval from 'The Steve'.
New MLS put in place.
We got the head in place and threw in the new head bolts and out came 'The Steve's'
worst fear, 'The Haynes book of Lies' for the torque settings.
......and that is that really, rain stopped play so when we get stuck in again we will
get more photos and update you all.
-
RoverRevival
- Forum User
- Posts: 7558
- Joined: Fri Aug 26, 2011 8:08 pm
- Location: Manchester
Re: 'Brian' The 25 - Repairs & Update
i'm not seeing the shim layer of the gasket there or is it an early pic 
Re: 'Brian' The 25 - Repairs & Update
There seems to be quite a loose definition of 'MLS' in general use. Goes with the times, I suppose, there are no longer any absolute truths.
Detail shots of the construction of some MLS gaskets show more than one steel layer, and often the sandwich is united by eyelet rivets through tabs extending front and rear.
The one in this post matches the BGA one I fitted to my rescue job last autumn. That had a single steel layer, conventional crushable fire rings and a pair of outer moulded
elastomer layers. These were bonded, probably by ultrasonic welding, by pinching them together through small rectangular apertures n the steel layer. These are apparent
in the pics above.
I eventually took the view that this was an upgrade of the elastomer design only, over the older narrow beads of elastomer, and fitted it as the instructions for one of those
in respect of bolt torques. I would suppose this would also mean the restrictions on liner height matching would not apply, though mine was an older closed deck engine where
this concern isn't mentioned. Mine's running OK, after a subsequent thermostat problem was sorted, but hasn't come out of hibernation to be stressed on the road yet.
Now that the engine in the pics is clean, it's possible to see the original gasket was fitted the right way up - the small head coolant holes were on the inlet side like the new one.


